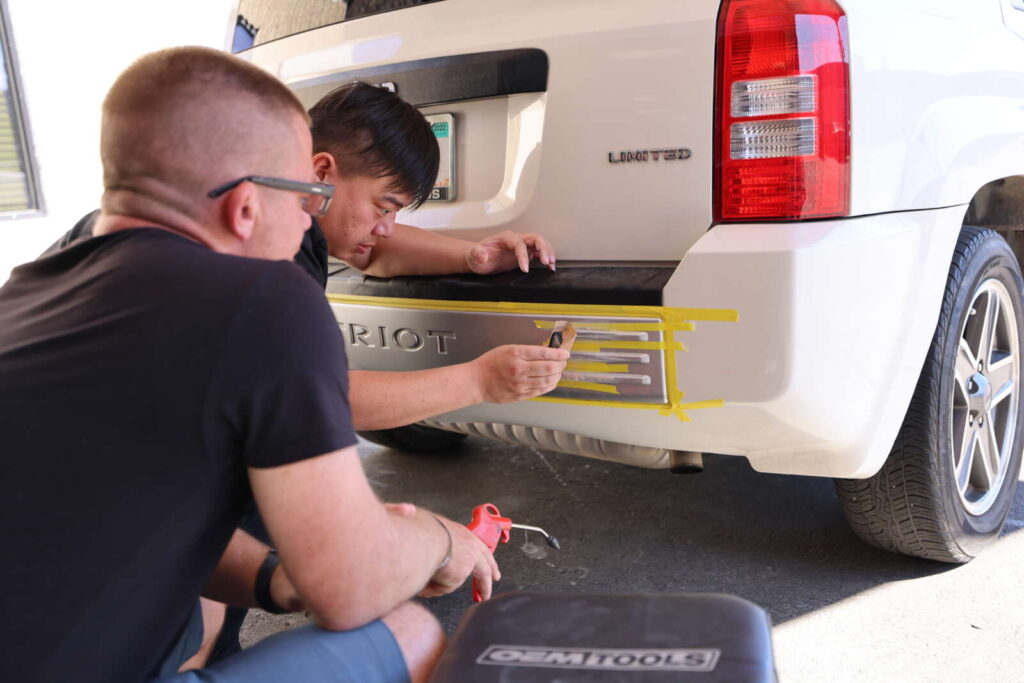
A scuffed bumper can be a frustrating sight for any car owner. Whether it’s a result of a minor collision, accidental brush against a wall, or the careless actions of another driver, a scuffed bumper detracts from the overall appearance of your vehicle. However, the good news is that repairing a scuffed bumper is often a manageable task that can be undertaken with a little knowledge, effort, and the right tools where a repair shop is unlikely to be needed. In this comprehensive guide, we will walk you through the step-by-step process of repairing a scuffed bumper, from assessing the damage to achieving a professional-looking finish.
Assessing the Damage
Before diving into the repair process, it’s essential to assess the extent of the damage on your bumper. Scuffs can range from superficial scratches to deeper gouges. Understanding the severity of the scuff will help determine the appropriate repair method and materials needed.
Cleaning and Preparing the Plastic Bumper Scratch
Before any repairs can take place, the bumper needs to be thoroughly cleaned and prepared. Start by washing the entire bumper with mild detergent and water. Remove any dirt, debris, or wax that may be present. Next, use a grease remover or wax and grease remover to ensure the surface is free from any contaminants that could interfere with the repair process. Finally, carefully mask off any areas around the bumper that do not require repair to protect them from accidental damage.
Sanding the Scuffed and Scratched Area
In order to create a smooth and even surface for the repair, it is necessary to sand the scuffed area. Begin by using a low-grit sandpaper (around 320-grit) to sand the damaged area. Sand in a circular motion, gradually blending the edges of the scuff into the surrounding undamaged surface. As you progress, switch to finer-grit sandpaper (around 800-grit) to achieve a smoother finish.
Applying Primer
After sanding, it’s crucial to apply a primer to the scuffed area. The primer acts as a bonding agent between the bumper and the paint, ensuring better adhesion and a long-lasting repair. Choose a high-quality automotive primer that matches the color of your bumper. Apply the primer in thin, even coats, allowing each coat to dry completely before applying the next. Follow the manufacturer’s instructions for the recommended drying time.
Painting the Bumper Scuff Repair Area
Once the primer has dried, it’s time to paint the bumper. For a seamless repair, you’ll need to use color-matched automotive paint. Obtain the paint from a reputable supplier, ensuring it matches the exact color of your vehicle. Shake the paint can vigorously to ensure proper mixing. Apply the paint in thin layers, allowing each coat to dry completely before applying the next. Repeat the process until you achieve a consistent and even color match with the surrounding area. We don’t recommend using spray paint.
Finishing Touches
After the paint has dried, it’s essential to protect and enhance the repaired area. Apply a clear coat over the painted surface to provide a glossy finish and protect it from the elements. Follow the manufacturer’s instructions for the appropriate application technique. Once the clear coat has dried, use fine-grit sandpaper (around 2000-grit) to polish the repaired area gently. Finally, apply a high-quality automotive polish to restore the shine and blend the repaired section seamlessly with the rest of the bumper.
Regular Maintenance
To keep your car bumper looking its best, it’s important to practice regular maintenance. Wash your vehicle regularly, being mindful to avoid harsh chemicals that could damage the repaired area. Additionally, consider applying a protective wax or sealant to further shield the bumper from scratches and scuffs. Taking these precautions will help preserve the beauty and longevity of your repaired bumper.
Repairing a scuffed bumper may seem like a daunting task, but with the right knowledge and tools, it can be accomplished successfully. Assessing the damage, cleaning and preparing the bumper, sanding the scuffed area, applying primer and paint, and adding finishing touches are all essential steps in the repair process. By following these steps carefully and paying attention to detail, you can restore your car’s bumper to its former glory.
Remember, if you’re unsure about your ability to repair the scuffed bumper yourself, it’s always a good idea to consult a professional. They have the expertise and experience to handle more extensive damage and can ensure flawless repair. However, for minor scuffs and scratches, with a little time and effort, you can achieve professional-looking results and take pride in restoring your car’s appearance.
Mastering the Art of Scuffed Bumper Repair: A Comprehensive Training Guide
Scuffed bumpers on vehicles can be a common occurrence and are often an eyesore. While professional repairs can be costly, acquiring the skills to fix scuffed bumpers yourself can save you time and money. With the right training and guidance, you can learn how to repair scuffed bumpers like a pro. This article will provide you with valuable insights and step-by-step instructions to help you gain the necessary skills to undertake this DIY project.
Understanding Scuffed Bumpers and the Damaged Area
Before diving into the repair process, it’s essential to understand the nature of scuffed bumpers. Bumpers are typically made of plastic, and scuffs can range from minor scratches to deeper abrasions. Learning about the materials and types of damage will enable you to assess the extent of the repair needed.
Gather the Required Tools and Materials
To effectively repair scuffed bumpers, you’ll need a set of tools and materials. Some essential items include:
- Sandpaper (various grits)
- Masking tape
- Clean cloth or sponge
- Plastic cleaner or mild detergent
- Plastic body filler
- Plastic adhesion promoter
- Automotive primer
- Automotive paint (matching your vehicle’s color)
- Clear coat
- Hardener
- Polishing compound
Steps to Repair a Scratched Plastic Bumper
In this part of the article, we are going to show you how to do the entire repair of your front or rear bumper yourself with materials from your local auto parts store. By utilizing the appropriate repair material and methods, you will be able to do the repair work yourself and restore the original contour of your vehicle without having to take it to a body repair shop for a fraction of the cost. As you will see, repair and refinishing the plastic or fiberglass bumper cover or original bumpers involves just a little time an know-how.
Cleaning and Preparation
- Start by thoroughly cleaning the damaged area using a plastic cleaner or mild detergent to remove dirt, grime, and any wax or polish residues by cleaning it with plastic surface cleaners.
- Remove any imperfections.
- Find any scratches
- Rinse the area and dry it with a clean cloth or sponge.
- Add a thin layer of scratch-filling putty
- Mask off the surrounding area of the bumper using masking tape to avoid accidental damage.
Sanding
- Use a low grit sandpaper (e.g., 320 grit) to sand the area by hand gently. This will smooth the surface and provide better adhesion for the subsequent steps.
- Gradually progress to higher-grit sandpaper (e.g., 800-1000 grit) to create a smooth finish.
- Ensure that the edges around the scuffed area are feathered to blend with the rest of the bumper.
Applying Adhesion Promoter, Primer, Paint and Clear Coat
- Apply a plastic adhesion promoter to the sanded area, following the manufacturer’s instructions. This will enhance the bond between the plastic and the primer.
- Apply a thin coat of automotive primer until you have covered the scuffed area. Allow it to dry according to the manufacturer’s instructions.
- Once the primer is dry, apply the automotive paint in thin, even coats, matching your vehicle’s color. Allow each coat to dry before applying the next until you achieve full coverage.
Clear Coat and Polishing
- Apply a clear coat over the freshly painted area to protect the paint and provide a glossy finish. Follow the manufacturer’s instructions for drying time.
- Once the clear coat is dry, use a polishing compound to buff the repaired area gently. This will blend the repaired section with the rest of the bumper, giving it a seamless appearance.
Practice and Refinement
Remember that mastery comes with practice. Begin by practicing on small, inconspicuous areas or spare plastic pieces before attempting repairs on your vehicle’s bumper. Refine your technique and make adjustments as needed, paying attention to color matching, consistency, and achieving a smooth finish.
Seeking Professional Scratch Repair Help
While learning to repair scuffed bumpers yourself is an excellent skill to acquire, there may be instances where professional assistance is required. Deep scratches, dents, or severe damage may need the expertise of an auto body shop. It’s essential to assess the extent of the damage and decide whether it falls within your capabilities or requires professional intervention.
Learning how to repair scuffed bumpers yourself can be a rewarding endeavor. With the right training, tools, and materials, you can achieve professional-looking results and save money in the process. Remember to practice on small areas before working on your vehicle’s bumper, and always assess the extent of the damage to determine if professional assistance is needed. By following the step-by-step process outlined in this article and refining your skills, you’ll be on your way to becoming proficient in scuffed bumper repair.
The Benefits of Hiring a Professional for Scuffed Bumper Repair
When it comes to the appearance and functionality of your vehicle, the bumper plays a crucial role. However, it is not uncommon for bumpers to get scuffed, scratched, or damaged due to accidents or general wear and tear. While some minor scuffs may seem like a simple DIY fix, hiring a professional for scuffed bumper repair can offer numerous benefits. In this article, we will discuss the advantages of entrusting the repair of your scuffed bumper to a qualified professional.
Expertise and Skill
Repairing a scuffed bumper requires specialized knowledge and skill. Professional technicians who specialize in automotive repairs possess the necessary expertise to assess the extent of the damage and determine the appropriate repair techniques. They are trained in various repair methods and have hands-on experience in dealing with a wide range of bumper damages. By hiring a professional, you can ensure that your bumper receives the best possible care and attention.
Quality of Work
A scuffed bumper that is repaired by a professional will often look as good as new. Automotive repair specialists have access to advanced tools, equipment, and high-quality materials required for bumper repairs. They can match the paint color precisely and apply it seamlessly to the damaged area, ensuring that the repair is virtually invisible. Professionals take pride in their workmanship and strive to deliver a flawless repair that meets or exceeds your expectations.
Time and Convenience
Repairing a scuffed bumper can be a time-consuming task, especially for someone without experience in automotive repairs. By hiring a professional, you can save valuable time and avoid the hassle of researching and acquiring the necessary materials and tools. Professionals have a streamlined repair process and can efficiently complete the job, allowing you to get back on the road sooner. Additionally, many professional repair services offer mobile repair options, coming to your location for added convenience.
Cost-Effectiveness
While some may assume that hiring a professional for bumper repair is costly, it can actually be a cost-effective option in the long run. Attempting a DIY repair without the required skills and knowledge may lead to further damage or an unsatisfactory result, ultimately costing you more money to rectify. Professionals ensure that the repair is done correctly the first time, reducing the risk of future complications. Moreover, they often have access to discounted prices for materials, enabling them to offer competitive rates for their services.
Insurance Considerations
If your scuffed bumper repair is covered by insurance, hiring a professional can simplify the claims process. Many repair shops have experience working with insurance companies and can help facilitate the necessary paperwork and communication. They can provide detailed estimates and documentation, making it easier for your insurance company to process the claim and reimburse you for the repair expenses.
While a scuffed bumper may seem like a minor issue, it is worth considering the benefits of hiring a professional for the repair. Their expertise, quality workmanship, time-saving convenience, cost-effectiveness, and insurance-related assistance make them the ideal choice for restoring your bumper to its original condition. By entrusting the repair to a professional, you can ensure a seamless and reliable solution, allowing you to maintain the appearance and value of your vehicle.


